Manual Bank Statement in SAP: A Complete Configuration Guide
In my previous post, I talked about how you can set up a bank key and a house bank ID. Both the bank key and the house bank plays an instrumental role in defining the bank accounts in the system. And, these can help in identifying the bank account and can also be used to make automatic bank payments using the Automatic Payment Program (APP) in t-code F110. Today, I will show you how to do the configuration for the manual bank statement in SAP.
A manual bank statement in SAP is a process to do the bank reconciliations in the system. Any bank transaction that you make in the system should be reconciled with the statement provided by a bank. For example, you made 5 different payments to a vendor and received 10 payments from customers. Once you make or receive a payment, you clear the open invoice in the system. But, the original payments will be done via bank portals. At the end of the month, you can download all your bank transactions using a bank statement from the bank portals in any supported format.
The bank statement consists of all the bank transactions that happened with vendors & customers (for the example that I gave above). This bank statement can be loaded into the SAP system for the reconciliation of open invoices. There are 2 types of bank statements: Manual and Automatic. In this post, I will focus only on MANUAL BANK STATEMENT IN SAP which allows you to upload the bank statement in the system manually and perform the bank reconciliation.
Let’s quickly jump to the configuration required to set up the manual bank statement process.
Table of Contents
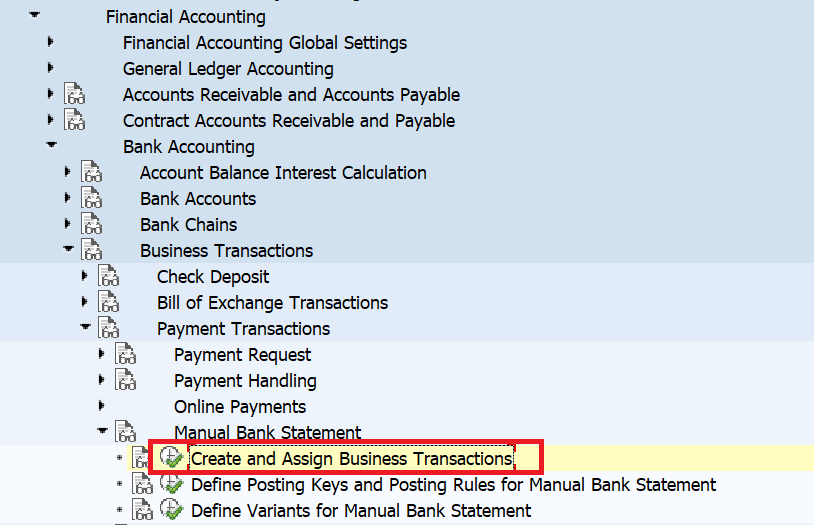
Step 1: Create and Assign Business Transactions
The first step is to define the business transaction codes that are required to identify the different types of transactions. For instance, you can have a business transaction for a credit memo, debit memo, cheque deposit, cheque withdrawal, etc. For each type of transaction, you can define a business transaction code. You can define these using the SAP Path given below.
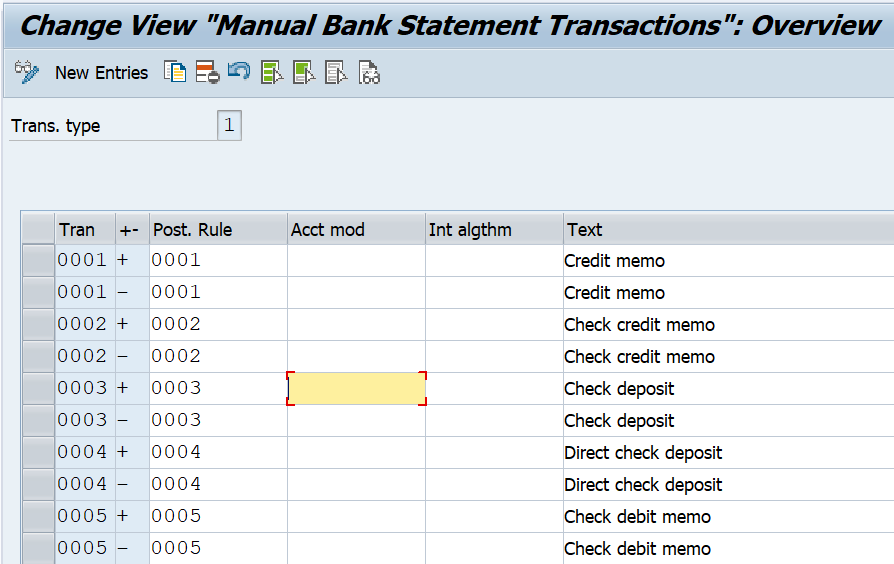
After you execute this transaction, you need to define the business transaction codes & assign the posting rules to it. As you might have already guessed, you also need to create the posting rules. For each transaction type, you need to assign a posting rule code. A posting rule helps in identifying the debit/credit transaction for a GL account.
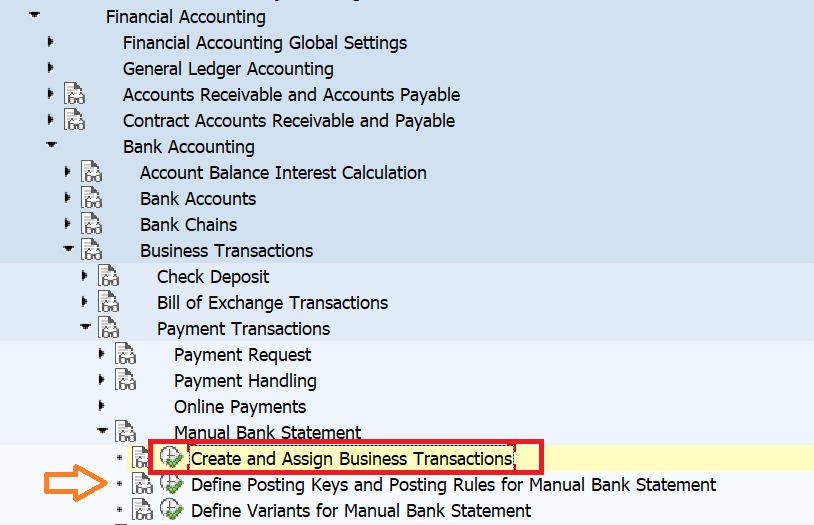
Step 2: Define Account Symbols
After that, click on the second config node to define the rest of the configuration.
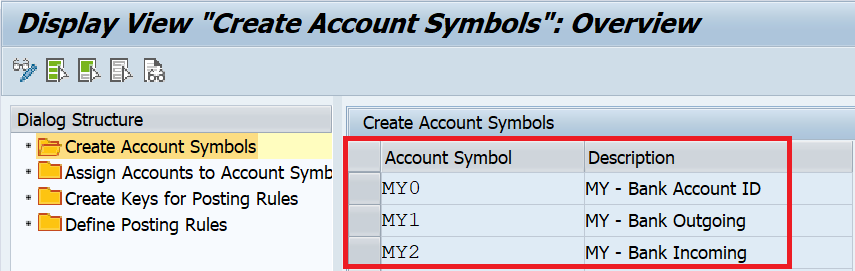
In the dialog structure box, you will see four different folders & all of these folders should be configured properly. Firstly, you need to maintain the account symbols for the bank transaction. An account symbol can be created for each bank clearing account. In SAP, usually, 3 bank GL accounts are created for each bank account (Main Bank GL, Incoming GL, Outgoing GL). For each type of bank GL account, you can define a separate account symbol. For example, I have created 3 different account symbols each for the main bank account, incoming bank account, & outgoing bank account.
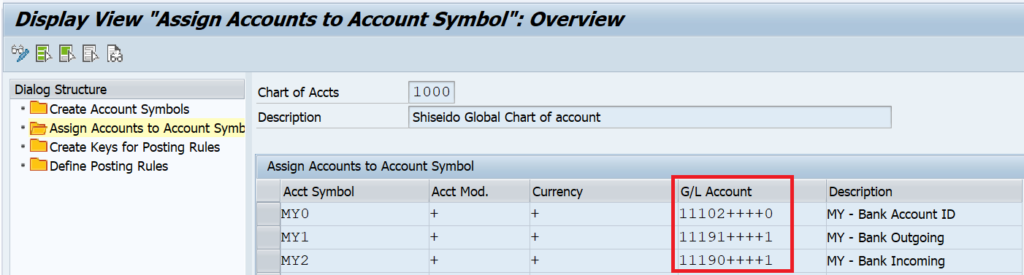
Step 3: Assign Bank GL Accounts to Account Symbols
After creating the account symbols, you need to assign the bank GL accounts to it. For example, the 4th and 5th digit of my main bank GL account is 02, for the incoming account it’s 90, & for the outgoing account, it’s 91. I have assigned the main bank GL account to MY0, the outgoing bank GL account to MY1, & the Incoming bank GL account to MY2 account symbols.
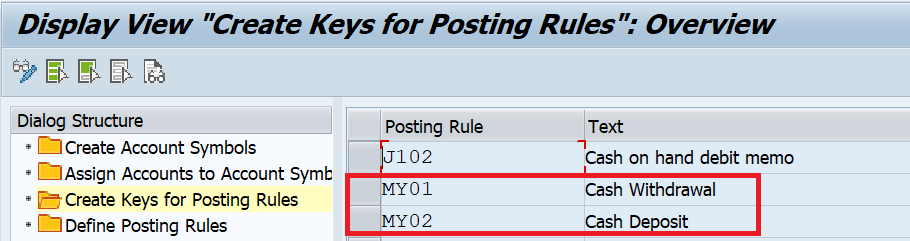
Step 4: Create Posting Rules Keys
As I explained earlier, you also need to define the posting rules that determine the type of transaction. In this example, I have created two posting rules: one for Cash Deposit (MY02) and the other one for cash withdrawal (MY01).
Step 5: Define Posting Rules
After creating the posting rule keys, you need to define the posting rules. This posting rule will determine which GL account will be debited or credited during the bank reconciliation posting. For example, Posting rule MY01 is for Cash Withdrawal, and to this posting rule, I have assigned posting key 40 (Debit) to MY1 and posting key 50 (Credit) to MY0. Now you know that in Step 3, I assigned MY0 to the main Bank GL account and MY1 to the outgoing bank GL account. Hence, this posting rule with debit the outgoing bank GL account and credit the main bank GL account. Similarly, I have also created a posting rule MY02 for cash deposits where I’m debiting the main bank GL account and crediting the incoming bank GL account.
You can also assign the document type which will be used to post the bank reconciliation accounting entries. For example, I’m using document type ZX here. During the posting of bank reconciliation entries, the system will use the document type ZX for posting.

With these 5 steps, your system is now ready for processing the manual bank statements. I hope you liked it!!! In case of any queries, please feel free to drop a comment and stay tuned for more tutorials coming your way!!!